This heavenly lemon chiffon pie is a treasured family recipe passed down through generations since the 1800s. With its cloud-like texture and delicate citrus flavor, it’s the perfect balance of light and luxurious. Unlike denser lemon desserts like tangy lemon bars, this pie practically melts in your mouth while delivering the perfect hint of sunshine in every bite.

Why You’ll Love This Lemon Chiffon Pie
- Ultra-creamy texture that’s lighter than air
- Simple ingredients you likely have in your pantry
- Perfect make-ahead dessert (actually needs time to chill!)
- Show-stopping presentation with minimal effort
- Versatile for both casual gatherings and elegant occasions
- Time-tested family recipe that never disappoints
This ethereal dessert holds such a special place in my heart. I can still picture myself as a little girl, watching my grandmother carefully fold those glossy egg whites into the lemony base. The magic of seeing that humble mixture transform into something so elegant never gets old! The secret lies in the perfect balance of fresh lemon juice and zest, giving it that authentic citrus flavor without overwhelming your taste buds.
What makes this pie truly special is its incredible texture. While many lemon pies can be dense or overly tart, this chiffon version is light as a cloud but still rich enough to feel indulgent. The filling literally melts the moment it hits your tongue! And when paired with a buttery homemade crust and dollops of fresh whipped cream? Pure heaven!
I’ve tested this recipe countless times over the years (tough job, but someone’s got to do it! 😉), and I can promise you – it’s practically foolproof when you follow the steps carefully. Whether you’re an experienced baker or just starting out, this heirloom recipe will become your new go-to for special occasions or anytime you need a little slice of sunshine.
Essential Ingredients for Perfect Lemon Chiffon Pie
Let me walk you through the star players in this treasured family recipe. Each ingredient works together to create that ethereal, cloud-like texture we’re after!
- Fresh Lemons: The heart and soul of this pie! You’ll need both juice and zest. I always reach for fresh lemons rather than bottled juice – trust me, the bright, natural flavor makes such a difference. Pro tip: room temperature lemons yield more juice!
- Eggs: We’re separating these gems into yolks and whites. The yolks enrich the filling while creating that signature silky texture, and the whites, when beaten to glossy peaks, give us that magical chiffon lightness. Just like in my lemon blueberry cookies, fresh eggs at room temperature work best.
- Butter: Creates an irresistibly smooth, velvety filling. Please use real butter here – margarine simply won’t give you the same luxurious results.
- Cornstarch: Our thickening hero! It helps create that perfect slice-able consistency without weighing down the airy texture.
Baker’s Success Tips

After years of making this pie (and learning from my fair share of mishaps!), here are my tried-and-true secrets for chiffon perfection:
- Master the Egg White Peaks: Beat your whites until they form stiff, glossy peaks – but don’t overbeat or they’ll become grainy. When you lift your beater, the peak should stand tall and barely curl at the tip.
- Perfect Your Tempering Technique: When adding hot filling to egg yolks, go slow! Add just a spoonful at first, whisking constantly. Rush this step and you’ll end up with scrambled eggs instead of silky pie filling.
- The Folding Method: Incorporate those beaten whites with a gentle hand. I use a large rubber spatula and make figure-eight motions, scraping the bottom and folding over the top. You want to maintain as much air as possible while ensuring no white streaks remain.
- Chill Properly: Give your pie at least 2 hours in the fridge – overnight is even better! This allows the filling to set perfectly and the flavors to meld beautifully.
Step-by-Step Instructions for Perfect Lemon Chiffon Pie
Let’s walk through making this heavenly pie together! I’ve broken it down into manageable steps that will help you achieve that dreamy, cloud-like texture every time.
Preparing the Lemon Filling
- Make the Base: In a large saucepan, combine 1½ cups water, fresh lemon juice, salt, 1 cup sugar, and butter. Bring this mixture to a gentle boil, stirring occasionally. The kitchen will start smelling amazing!
- Create the Thickener: While your mixture heats, whisk cornstarch with ½ cup water until smooth. This step is crucial – lumpy cornstarch means lumpy filling! Pour this slurry into your boiling mixture, reduce heat to low, and stir constantly until thickened.
- Master the Egg Technique: Here’s where the magic happens! Separate your eggs, keeping both yolks and whites. After beating the yolks, slowly temper them with hot filling – just like making my Italian lemon pound cake. Add spoonfuls of hot filling while whisking constantly.
Creating That Signature Chiffon Texture
- Whip Those Whites: Beat egg whites until foamy, then gradually add remaining sugar. Keep beating until stiff, glossy peaks form – they should stand tall when you lift the beater!
- The Gentle Fold: This is where patience pays off! Carefully fold your beaten whites into the cooled lemon mixture using a figure-eight motion. Take your time – we want to keep all that beautiful air we’ve whipped in.
- Assembly and Chill: Pour into your pre-baked crust, spread evenly, and refrigerate for at least 2 hours. I like covering with parchment paper rather than plastic wrap to protect that gorgeous surface.
Delicious Variations and Serving Ideas

This classic pie is perfect as-is, but here are some creative ways to make it your own:
- Citrus Swap: Try lime, orange, or even grapefruit juice for a fun twist! Just maintain the same acid-to-sugar ratio.
- Topping Adventures: While fresh whipped cream is classic, consider:
- Torched meringue topping
- Candied lemon slices
- Fresh berries and mint
- Crust Options: Beyond traditional pie crust, try:
- Graham cracker crust
- Gingersnap crust
- Shortbread crust
Remember, this pie needs to be stored in the refrigerator and is best enjoyed within 2-3 days – though it rarely lasts that long in my house! For the prettiest slices, dip your knife in hot water and wipe clean between cuts.
FAQs & Final Thoughts
Frequently Asked Questions
Absolutely! This pie actually benefits from chilling overnight. Just wait to add the whipped cream topping until right before serving. Cover with parchment paper rather than plastic wrap to protect the filling’s surface.
Make sure your bowl and beaters are completely clean and free from any grease. Even a tiny bit of egg yolk can prevent whites from whipping properly. Room temperature eggs also whip better than cold ones.
While you can, I really recommend fresh lemons for the best flavor. Just like in my favorite lemon cake recipe, fresh citrus makes all the difference in creating that bright, authentic taste.
The most common cause is not cooking the cornstarch mixture long enough. Make sure it’s thick and bubbling before moving on to the next step. Also, give the pie plenty of time to chill – at least 2 hours, preferably longer.
Final Thoughts
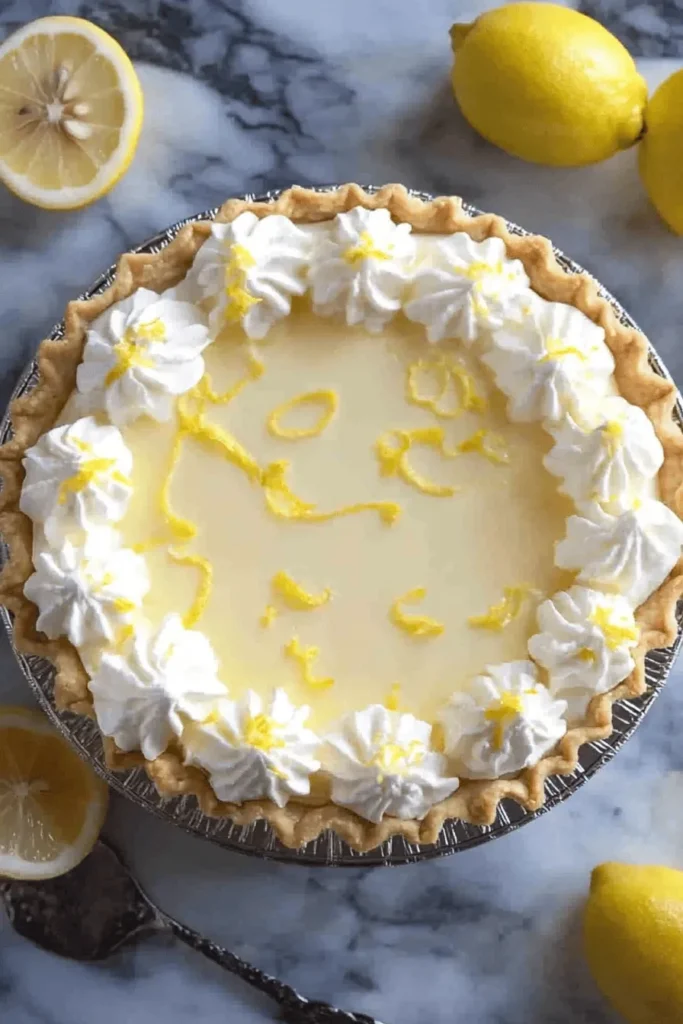
You know what makes me smile every time I bake this pie? Knowing I’m sharing a little piece of my family’s history with you! This recipe has brightened countless celebrations over the generations, and I just know it’ll become a treasured favorite in your kitchen too.
Remember, don’t feel intimidated by the steps – take your time with the egg whites and tempering process, and you’ll be rewarded with the most heavenly, cloud-like pie you’ve ever tasted. I’d absolutely love to hear how this recipe turns out in your kitchen! Drop a comment below or tag me in your pie photos – sharing these kitchen adventures with you brings me so much joy! ♥
Happy baking, friends! And remember – a little slice of lemon chiffon pie makes any day feel special!

LEMON CHIFFON PIE
Equipment (affiliate links)
- Pie Pan
- Hand mixer
Ingredients
- 1 9 inch baked pie shell
- 1 1/2 cups water
- 1/2 cup lemon juice
- dash salt
- 1 1/2 cups granulated sugar divided
- 1/2 cup butter
- 5 Tablespoons cornstartch + ½ cup water
- 3 large eggs yolks and whites separated
- lemon zest from one small lemon
- fresh whipped cream for topping
Instructions
- Add 1 ½ cups water, lemon juice, salt, 1 cup sugar, and butter to a large saucepan. Bring mixture to a boil.
- While waiting for mixture to boil, stir cornstarch and ½ cup of water together in a small bowl. Stir into saucepan and turn heat to low. Cook until thickened.
- Separate the egg yolks and whites into two separate bowls. Beat the egg yolks with a fork.
- Add a large spoonful of the hot mixture from the saucepan, to the egg yolks and stir well. Continue slowly adding a few more spoonfuls, stirring after each addition to temper the eggs.
- Add the tempered egg mixture to the saucepan. Remove from heat and stir in lemon zest. Allow to cool for 10-15 minutes.
- Beat the egg whites with electric beaters. Slowly add ½ cup sugar as you go. Beat until stiff peaks form.
- Fold egg whites into the mixture in the saucepan.
- Pour filling into cooled pie shell. Chill in refrigerator for at least 2 hours. I like to place a piece of wax or parchment paper gently over the top of the pie (if you use plastic wrap or tinfoil it will pull some of the topping off when you remove it).
- Top with freshly whipped cream.

Leave a Reply